

Categories
Recent Posts
Tags
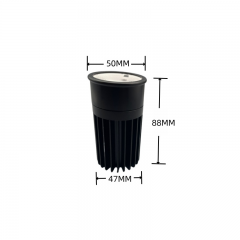
The DC24V GU10 LED Module 12W is a premium low-voltage lighting solution designed for modern architectural and commercial applications. Featuring high efficiency, excellent light quality, and reliable performance, it delivers comfortable illumination with long-lasting durability, making it ideal for hospitality, retail, residential, and smart light1
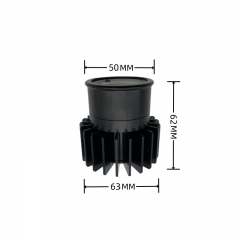
The DC24V GU10 LED Module 10W is a premium low-voltage lighting solution designed for modern architectural and commercial applications. Featuring high efficiency, excellent light quality, and reliable performance, it delivers comfortable illumination with long-lasting durability, making it ideal for hospitality, retail, residential, and smart light1
The DC24V GU10 LED Module 10W is a premium low-voltage lighting solution designed for modern architectural and commercial applications. Featuring high efficiency, excellent light quality, and reliable performance, it delivers comfortable illumination with long-lasting durability, making it ideal for hospitality, retail, residential, and smart light1
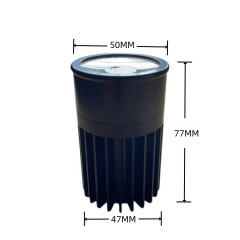
The DC24V GU10 LED Module 7W is a premium low-voltage lighting solution designed for modern architectural and commercial applications. Featuring high efficiency, excellent light quality, and reliable performance, it delivers comfortable illumination with long-lasting durability, making it ideal for hospitality, retail, residential, and smart lighti1
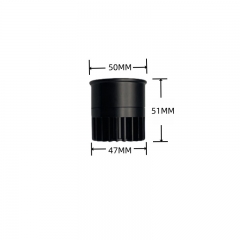
The DALI DT8 3CCT Tunable IP65 Waterproof GU10 LED Module 12W is a smart and energy-efficient lighting solution featuring 3000K/4000K/6000K tunable white control, smooth dimming, and high visual comfort. With an IP65 waterproof rating, it is ideal for bathrooms, hotels, retail spaces, and other indoor or semi-outdoor applications, delivering reliab1
Firstly, you need to prepare the black and red wires which will be used when assembling a lamp. And take a measure to cut in proper length in advance or you can buy from market directly. At the same time, you need to solder wire onto the led chip, which will be easier for you to solder the black red wire onto the led chip PCB "+" "-"; Besides, you need to make a trial for the led connector male side to connect to the red black wire to see how long the wire needed; it's better you make one sample in advance, then you will be very clear of the steps to make a completed led grille lamp;
 |
 |
Secondly, solder the wires onto the led chip, screw the led holder onto the led chip above the heat sink, put aluminum reflector and led cover onto the led holder,then rotate the lamp cover onto the heat sink to finish a head, check the picture below;
Thirdly, after all the heads being fixed well,then install the head inside the lamp frame, the white rectangular frame, you need some skills for this step,because you are going to fix two heads in one frame. I will use screw driver to fix one inner hole first, then adjust the middle ring. Surely before doing this, you need to fix the middle ring into the frame at the first step, then put the head in the middle to fix. One by one, you will see as the below left picture showed;
 |
 |
Fourthly, after the 2 heads installed in the frame, you need to connect the two heads black red wires to the male connector black red wire, remmeber,two heads share one male connector, for the 2*9W, we are using 1 led driver;
Fifthly, fix the driver box to cover the driver,as the lamp back side, 4 screws, easy to finish;


Copyright © 2026 WeiYe Optoelectronic Technology Co., Ltd..All Rights Reserved. Powered by dyyseo.com.
Friendly Links :
The professional team service!